
by Pam Hanson
Member, Wild Ones St. Louis Chapter
 After attending a Zoom meeting late last fall, I decided to try my hand at milk jug winter sowing. I don’t recall the lady’s name who hosted the meeting, but I believe she was from the St. Louis area. She was very thorough with her information. Following is how I went about doing my winter sowing of seeds.
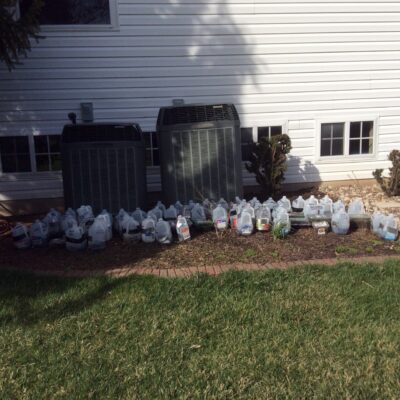
My adventure started the day after Thanksgiving when my sister and I went out to the garage to start the process of planting the first seeds. We concentrated on the seeds that needed at least 60 days of stratification. We took the milk jugs that my neighbors and I had collected for about two months. Any opaque container will work and I found that the big rectangular lettuce containers worked really well if I had a lot of seeds of like kind to plant. You just have to remember to cut out holes in the lid which will allow for the rain and snow to enter.
We took box cutters and made about four triangular holes for drainage in the bottom of the milk jugs. You could also use a drill bit to add drainage holes. Then we made a horizontal cut from the right side of the handle all the way around the jug ending right before we got to the handle. Leave about 1-2” by the handle intact which forms a nice little hinge that allows for opening and closing the milk jug with ease.
Then we filled the milk jugs with about 4” of potting mix. This will allow for the roots to have plenty of growing space in addition to holding moisture a longer amount of time. Patting this dirt down a bit allows for a nice firm base of dirt. On top of this potting mix, we sprinkled the seeds and then topped with an additional potting mix. As a general rule of thumb, look at the length of the seed and that’s about how much mix will be put on top of the seeds. Again, pat down the dirt so that the seeds have a nice base to hang onto after they start germinating. This also keeps the seeds in place after a hard rain or good watering. If the seeds were miniscule (smaller than granules of salt), the seeds were sprinkled on top and then tamped down to keep the seeds from disbursing upon hard rains or watering. At this point, water the soil quite well.
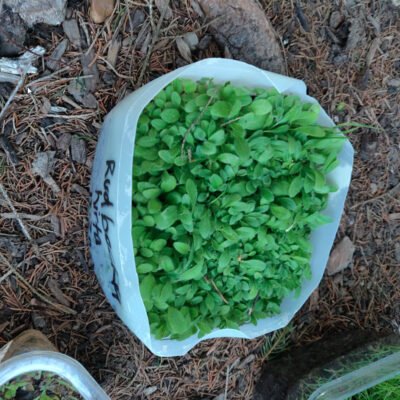
Rudbeckia hirta seedlings
As an experiment, the last few milk jugs that I prepared, I cut entirely around the jug leaving the handle on the top section. After preparing the soil, I inserted the top half of the jug inside of the lower half eliminating the need for the duct tape. The seeds in these containers seemed to germinate just as well as the tightly sealed up milk jugs, so I will most likely be eliminating the duct tape step this fall. The added bonus was that when spring rolled around, I could just pull off the top half if I wanted to sneak a peak at the seedlings.
The milk jug lid is not used which allows for rain or snow to enter into the milk jug for moisture throughout the winter months. However, on some of my milk jugs I wrote on the lid with a sharpie what seeds are contained in that particular milk jug. If you don’t re-use the lid for this purpose, I would suggest using a Popsicle stick, a cut out piece of plastic milk jug or another item to write what seeds are in the milk jug…. After writing on your ‘marker’, throw this into the container.
After the seeds have been planted, close the top portion of the jug and then seal with duct tape. The duct tape will go all the way horizontally around the milk jug with the exception of the handle part that was not cut.
In addition, write with Sharpie on the outside of the milk jugs at least twice, once on the top and once toward the bottom what was contained in each jug. This is done because even a Sharpie will fade with time and especially when spring hits and the sun beats down on the jugs.
After you’ve planted your seeds, place the containers where you’ll get the most amount of sun. Let them sit outside throughout the winter months allowing for the stratification process to happen. If you check on your containers weekly, or even monthly, you’ll find that absolutely nothing will be happening.
Come spring, make sure that the soil stays moist. It doesn’t have to be super wet and I found that with the snow and rain we received throughout the winter, I really only had to add water through the open lid area to the milk jugs after spring was upon us and the soil seemed to be getting somewhat dry.
Before you know it, your seeds will start germinating. Using your best judgment, water when needed.
When the temperatures started getting a little warmer and the seeds had germinated is when I started removing some of the duct tape to allow for air to circulate throughout the milk jugs. As an alternative, you could cut out a ventilation hole on the upper half of the milk jug. If the delicate little plants get too hot, they will burn up and die. Of my 73 milk jugs that I planted, I had one milk jug of seedlings that I sadly lost to overheating.
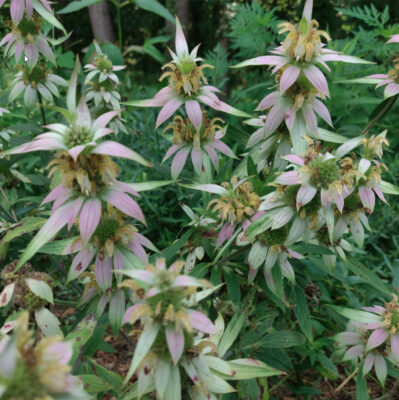
Monarda punctata flowers
When the overnight temperatures were staying around 50 degrees or so is when I opened up the milk jugs to allow for hardening of the seedlings. At this point, I was watering the seedlings quite often. Once I knew I was in the clear of freezing temperatures is when I just cut off the top half of the milk jug. Continue watering as needed.
As a general rule of thumb, you don’t want to transplant the seedlings until they look as though they have a good solid root structure and have a strong upper plant. When transplanting, divide the milk jug plants into hunks of seedlings. I found that the bigger the hunk, the better the survival rate of the plants. Generally, I was pretty liberal with my seeds. If lots of seeds germinated, I gently divided these into more chunks.
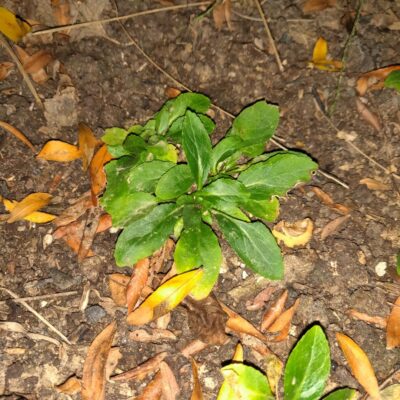
The first year after transplanting, most of the plants and flowers will be working on their roots. My cardinal flower (Lobelia cardinalis) is looking very nice, but still only about 3/4” tall. The spotted beebalm (Monarda punctata) didn’t bloom, but grew to a nice 12” tall. Black-eyed susans (Rudbeckia hirta) had very nice blooms. The rock pink (Phemeranthus calycinus) got a nice base going and grew to about 2” tall. I will be sowing more of these seeds, but come next spring, I may transfer the whole group of seedlings as one big hunk. I lost many because the plants were itty bitty and weren’t strong enough to be divided into smaller chunks.
Another experiment I did was sow 10 varieties of seeds directly into normal soil. The black-eyed susans came up nicely, but didn’t bloom. The clammyweed (Polanisia dodecandra) grew nicely and did bloom. I got two Common milkweed plants (Asclepias syriaca) , but that was the extent of my plants. There was no sign of the other seven plants. They got enough stratification time, so I know that wasn’t the problem.
 After talking with Chapter member Dawn Weber, next year I don’t think I’ll worry as much about the 60 day vs. 30 day stratification periods that were recommended on the Prairie Moon Nursery website. I will be planting on warmer days knowing that the seeds have plenty of stratification time and will do their thing when they want to. They are smart in that respect. No more waiting until January and then realizing that I didn’t have enough potting mix only to have to go to Home Depot traipsing through 1’ of snow in the freezing cold temperatures to get more. And then realizing that it was frozen solid. Yes, imagine me in the freezing garage trying to break apart the frozen potting mix. My little shovel wasn’t doing the trick so I got out a hammer. Yeah that didn’t work very well either. I ended up dumping the whole bag into a wheelbarrow, waiting for a sunny day and then moving it into the sun. This allowed the mix to thaw out.
All in all, milk jug sowing was a huge success and this is the only way to go for me. If anyone knows who hosted the Zoom meeting last fall, please pass along a thank you from me for all of her time and information. I couldn’t have moved forward with the ease that I did without that meeting!

Great information, Pam. Well written and easy to follow. Thanks for sharing.